Materials Needed:
- Certified fiberglass-free HEPA filter (or fiberglass-free MERV-16 if HEPA is not available)
- Spunbond polypropylene or clean non-woven reusable grocery bags made from spunbond polypropylene (not coated reusable grocery bags)
- Thin spunbond from hair nets or shoe covers
- Citric acid (or lemon juice)
- Low temp hot glue and gun (high temp hot glue tends to melt HEPA filters and spunbond too much)
- File folder fasteners for the nose piece (not needed if only make cloth mask insert)
- ⅜” elastic, two pieces 11” long (not needed if only make cloth mask insert)
Template
File
Step One
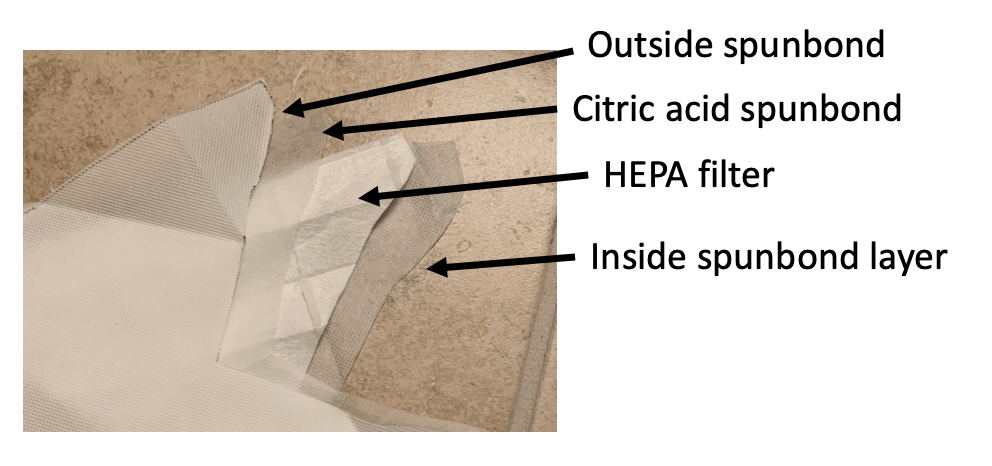
Spray citric acid-water solution (¾ tablespoon of citric acid to 1L water) onto fabric. As long as you do not feel irritation while wearing it, you can spray as much as you can to improve performance against viruses. After spraying, dry it in a ventilated room.
Step Two
If needed, remove the HEPA filter and flatten it. Gently fold the HEPA filter in half and use the template to cut the folded filter into the mask shape (solid outline on template). HEPA filters often contain fiberglass and appropriate precautions are needed such as wearing a mask and protective clothing. Seal any holes in the HEPA filter.
Step Four
Repeat step 3 using thin spunbond polypropylene that was sprayed with citric acid.
Step Twelve
Glue and press the sides of the mask together.
Step Thirteen
While wearing the mask, bend the nose piece to form a tight seal. It is important to make sure the mask seals and that the nose clip holds the mask in place.
Mask User Seal Check
Alternative nosepiece material options listed with preferred at top:
- File folder fasteners
- Pipe cleaner
- Nite Ize Gear Ties or Foam Twist Ties
- Aluminum foil folded up
- Wire- 12 gauge copper craft, 16 gage steel,
- Paper clip
Elastic/material used to secure mask to face options:
- ⅜ inch elastic cord
- ¼ inch elastic cord
- Shoelaces
- Elastic from socks
- Paracord


