
Are you looking for filter inserts that are more effective than a simple piece of cloth? These instructions are based on the materials used in N95 masks and will form a more effective barrier to particulates.
These instructions can also be downloaded as a printable pdf.
Download
Instructions
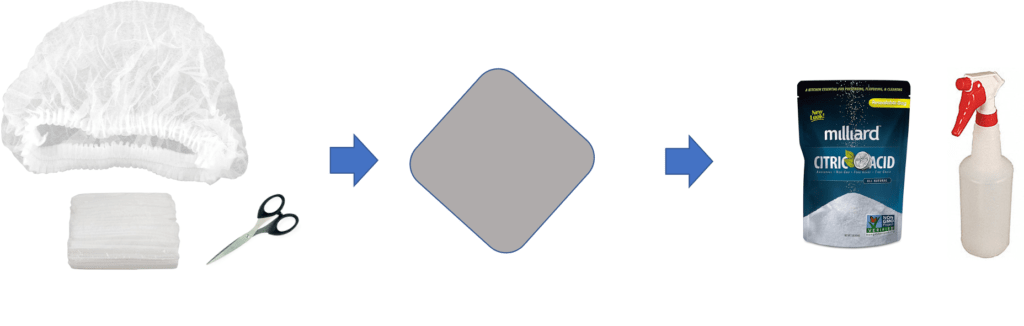
What you will need:
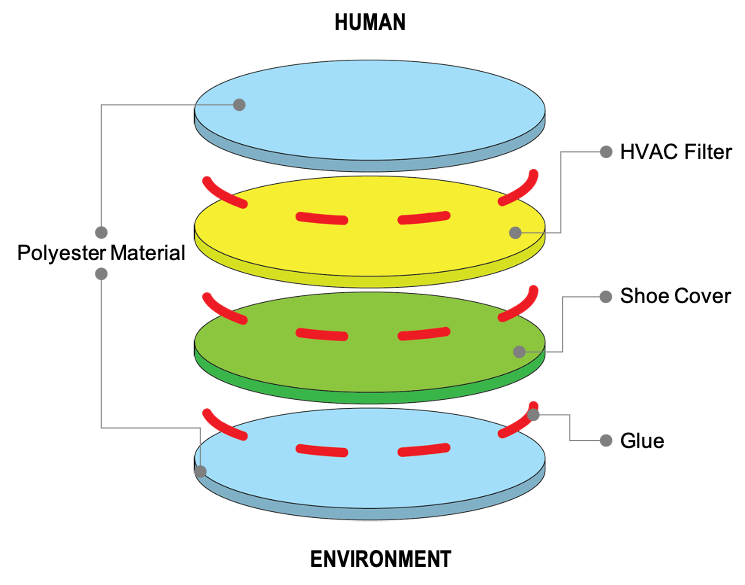
- HVAC Filter (HEPA is preferred, MERV 16 is second choice). A HEPA/MERV/Vacuum bag filter on its own may release glass fibers that can be inhaled. This design contains two filters on either side to help prevent that.
- Shoe protective cover or hairnet.
- Polyester material (Spunbond or Meltblown)
- Citric acid solution
- Scissors
- Hot glue gun
Overview
It is recommended that four layers of material be employed for the filter inserts. The HVAC filter stops the particulates, the shoe cover impregnated with citric acid kills the virus and the polyester layers help prevent moisture build up.
These layers are glued together to ensure the most effective seal and prevent air bypass.
These should be made to the specific dimensions for the mask that you are using. Since there are many masks in which these inserts could be employed, there will not be a particular link included here.
These filter inserts could be used in the soft mask that we have posted instructions for.
STEP ONE:
Trim the shoe cover, or hairnet (made of non-woven fabrics) into the face mask insert shape. This should be from the center of the item, do not include the elastic perimeter. This can be removed and can be used later as elastic to hold the mask on the face if you don’t have your own elastic.
STEP TWO:
Spray 1.8 wt% (3/4 tablespoon of citric acid to 1L water) citric acid water solution onto the trimmed shoe cover fabric. As long as you don’t feel irritation while wearing it, you can spray as much as you can to improve the performance against the virus. After spraying, dry it in a ventilated room. Before assembling the mask, make sure that the material is completely dry – moist fabric will be a breeding ground for bacteria!
STEP THREE:
Use the same template to cut out sections from the HVAC filter and the polyester materials. Make sure that all of the materials are the same size. A HEPA/MERV/Vacuum bag filter on its own may release glass fibers that can be inhaled. This design contains two filters on either side to help prevent that. Be careful of this while working with the HEPA material.
STEP FOUR:
Next, assemble the filter layers. Mark the layer that should be close to the face and that one that should be on the outside of the mask (see the overview above). One by one, glue the layers together. Don’t use too much glue, but ensure that the layers are well sealed. When you are combining the layers, take time to press the layers together. Use the back of a spoon to protect your fingers from the hot glue.
STEP FIVE:
If you are making these as inserts for a rigid mask, you can now place these into the mask. If these are to be inserts for a soft mask you can now incorporate this filter layer into the mask you are creating.